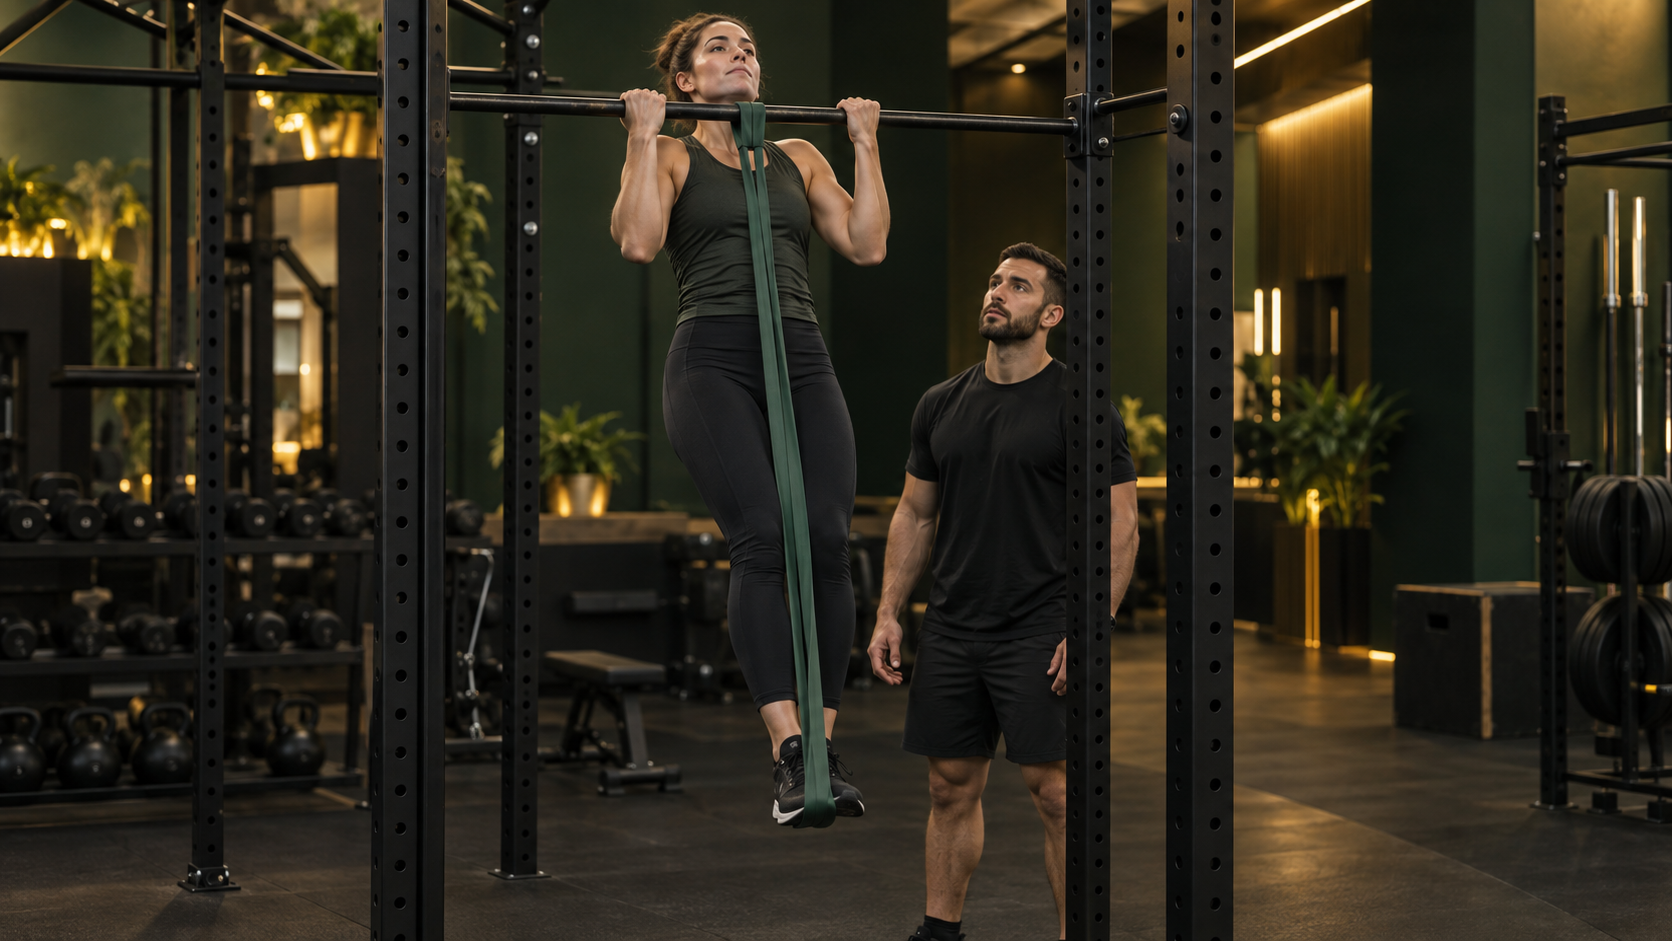
A first pull-up is built by reducing assistance while grip, range, and control remain repeatable.
Your First Pull-Up in Massanassa: A Realistic Progression from Zero
Author
Alphafit Team
Editorial team at Alphafit Gym Massanassa
Reviewed by
Alphafit Technical Coaching Team
Strength training and personal coaching team in Massanassa
You hang from the bar, try to pull, and nothing happens. Or you rise a few centimetres, but your chin still feels a mile away. Working towards a first pull-up can make it seem as if you are missing strength everywhere at once.
It is not a test you should expect to pass on your first day in the gym. A pull-up is a demanding skill: you move your own body while coordinating your back, arms, grip, and trunk. At Alphafit Gym Massanassa, we treat it like any other strength goal: establish your starting point, choose a version you can train, and progress without turning every session into ten failed attempts.
This guide gives you a realistic route. It does not promise a pull-up in eight weeks because two people following the same plan may need very different amounts of time. It will show you what to train now and which sign tells you it is time to progress.
Why your first pull-up is not there yet
Pull-ups depend heavily on relative strength: the force you can produce in relation to the mass you have to move. Grip, pulling coordination, specific practice, and the ability to keep your body stable also matter.
A study of college-age women found that the participants who achieved a pull-up after the programme had greater maximal strength and better strength-to-body-mass or strength-to-fat-free-mass ratios (Flanagan and colleagues). That does not mean there is one “correct” body weight or that losing weight is the only route. It means you can work on both sides of the equation: produce more force and use it more effectively in the movement.
Before changing your whole routine, identify what happens when you try:
- You cannot stay on the bar: begin with grip and hanging tolerance.
- You can hang, but your shoulders rise and the pull does not start: practise scapular control and pulldowns.
- You reach the middle of the rep: build full-range strength with assistance and negatives.
- You already have 1–3 reps: stop testing your maximum in every set and accumulate clean repetitions.
None of these stages is a failure. It is a diagnosis that helps you choose the next exercise.
What counts as a clean pull-up?
Use the same standard each time so that you can measure progress:
- Start hanging with your elbows extended and your body stable.
- Begin without jumping or swinging.
- Drive your elbows down as your chest approaches the bar.
- Clear the height of the bar with your chin without craning your neck for the last centimetres.
- Lower under control to the agreed starting position.
You can use a pronated grip—palms facing away—a supinated grip, or a neutral grip, depending on the bar available and what you can practise without discomfort. You do not need an extremely wide grip. A repeatable position that lets you move your shoulders and elbows with control is more useful while learning.
If you feel sharp pain in a shoulder, elbow, or wrist, do not force the repetition. Change the grip or variation and seek an appropriate assessment if the discomfort continues.
The progression: choose the step you can train today
You do not have to complete each stage as if it were a video game. You can combine two steps during the same week as long as your technique and recovery hold up.
Step 1: grip and active hanging
Start with short hangs if the bar still feels intimidating. Use a box or stable support to reach it without wasting energy on a jump, then practise two positions:
- a comfortable hang, with a firm grip and controlled breathing;
- a scapular pull-up, creating a small movement by drawing your shoulders away from your ears without bending your elbows much.
Perform 3–4 sets of 10–30 seconds of hanging or 5–8 scapular reps. This is a practical range, not a universal test. Progress when you can repeat the work without losing your grip or turning every attempt into a struggle.
Grip is not a minor detail. A recent study of 30 physically inactive men compared additional forearm, core, or interval work within pull-up programmes. Every group improved, but the forearm group made greater gains in repetitions and grip strength (Sepehri Rahnama and colleagues). The sample was small and specific, so it does not prove a universal recipe, but it supports one useful idea: if your hands fail first, grip training deserves space.
Step 2: lat pulldowns
The pulldown trains vertical pulling with an adjustable load. Use it to learn how to drive your elbows down, keep your trunk stable, and progress without having to move your entire body weight yet.
Perform 3–4 sets of 6–12 repetitions. Choose a load that leaves one to three possible reps without swinging your torso. Once you reach the top of the range with consistent technique, increase the load gradually.
In an eight-week study of 34 active male college students, two pulldown variations improved both pulldown strength and pull-up repetitions (Li and colleagues). The finding does not make one specific pulldown compulsory, but it shows that strengthening an adjustable version of the pattern can transfer to pull-up performance.
Step 3: assisted pull-ups
An assisted machine, a resistance band, or controlled foot support lets you practise the complete range. Use enough help to make the rep resemble the pull-up you want to achieve, but not so much that the effort disappears.
A simple progression looks like this:
- perform 3–4 sets of 5–8 clean repetitions;
- keep the same assistance until every set is controlled;
- then reduce the help by one small step;
- accept a return to the lower end of the rep range and build again.
Record the assistance just as you would record a machine load. “Green band” or “30 kg of assistance” gives you useful information; “I did some pull-ups” does not let you compare sessions.
Step 4: controlled negatives
For a negative, begin at the top using a box or stable support and train only the descent. Place your chin above the bar, remove your support, and lower for 3–5 seconds without dropping.
Perform 2–4 sets of 2–4 reps. Stop when you can no longer control the descent: one twelve-second negative followed by three drops is not better than three consistent repetitions.
Negatives are demanding. You do not need to fill the session with them or perform them every day. Combine them with pulldowns, assistance, and rows so you can recover from the total workload.
Step 5: full reps without chasing failure
Once one repetition appears, the temptation is to test it repeatedly. Spreading out quality reps works better.
If your current maximum is 2, try 4–6 sets of 1 rep with long rests. When they all look similar, add an occasional set of 2. You can then perform 2–3 assisted sets to accumulate more practice without distorting your technique.
Progress does not have to mean “one more every Monday.” It may be the same repetition with less swing, a more controlled descent, or less assistance. Our guide to load progression will help you organise those decisions.
A two-day plan for your first pull-up
Add this block to the beginning of two upper-body or full-body workouts. Leave at least one day between sessions when you start.
Day A: specific strength
| Exercise | Sets x reps | Standard |
|---|---|---|
| Assisted pull-up | 4 x 5–8 | Same assistance and range on every set |
| Lat pulldown | 3 x 6–10 | 1–3 reps in reserve |
| Seated row | 3 x 8–12 | Stable trunk and controlled return |
| Bar hang | 3 x 15–30 sec | Stop before the grip opens |
Day B: control and accumulation
| Exercise | Sets x reps | Standard |
|---|---|---|
| Negative or full pull-up | 3–5 x 1–3 | Controlled descent without dropping |
| Neutral- or underhand-grip pulldown | 3 x 8–12 | Full range without momentum |
| One-arm row | 3 x 8–12 per side | No torso rotation |
| Biceps curl or farmer’s carry | 2–3 x 10–15 or 20–30 m | Assistance, not the main event |
If you cannot tolerate hanging yet, replace the negatives with more pulldown and grip work. If you can already perform several pull-ups, start both sessions with full reps and use assistance afterwards.
This block still has to fit the rest of your routine. Our guide to back training in Massanassa explains how to balance vertical pulls, rows, and accessory work.
How to know when to reduce assistance
Reduce the help when you can meet these standards in two sessions:
- complete every planned repetition;
- begin from a consistent position;
- avoid momentum from your hips or legs;
- control the descent;
- and finish with enough margin to repeat the same technique.
Change one variable at a time: less assistance, more repetitions, or an additional set. Current ACSM recommendations emphasise that consistency and appropriate progression matter more than making a programme complicated. For this goal, a small improvement you can repeat is worth more than one heroic attempt you cannot train.
Mistakes that delay progress
Testing your maximum every workout
A test tells you where you are; it does not build everything you are missing. Limit full attempts and spend most of your work on trainable variations.
Using a band that fires you upwards
A band is useful when you can control the range. If it launches you out of the bottom but leaves you stuck at the top, adjust the help or use an assisted machine for more measurable steps.
Training only pulldowns and never touching the bar
Pulldowns build strength, but pull-ups also require grip, hanging, and coordination. Combine general transfer with specific exposure.
Doing negatives until your elbows are overloaded
Negatives pack a lot of demand into little volume. Dose them carefully and do not train through increasing pain.
Comparing your timeline with somebody else’s
Your first pull-up depends on your starting point, training history, relative strength, frequency, and technique. Use readiness criteria, not a deadline borrowed from the internet.
Should you start with an overhand, underhand, or neutral grip?
You do not have to commit to one variation forever. An underhand grip usually makes the biceps’ contribution very obvious; a neutral grip feels comfortable for many people; and the overhand pull-up is the classic standard many trainees want to master.
Begin with the grip you can practise through a stable range without discomfort. Keep it for several weeks and record your progress. Changing every workout makes it difficult to know whether you are actually getting stronger.
Your first pull-up is built before it becomes visible
You may go for weeks without a complete rep while clear signs of progress accumulate: you hang for longer, use less assistance, control your negatives, and lift more on the pulldown. That is already specific progress.
At Alphafit Gym Massanassa, we can help you find your current step, adjust the assistance, and fit this goal into a complete routine. You do not have to wait until you are “strong enough” to practise; you need a version you can train well today.
If you want to turn scattered attempts into a measurable plan, explore our training services or book your trial. Your first pull-up does not need a magic date—it needs the right next repetitions.
Sources
- Training college-age women to perform the pull-up exercise · Research Quarterly for Exercise and Sport
- Eight-week lat pull-down resistance training with joint instability leads to superior pull-up endurance performance and reduced antagonist coactivation in recreationally active male college students · European Journal of Sport Science
- Comparative Effects of Core Versus Forearm Training on Pull-Up Repetition Performance in Physically Inactive Males · Sports
- American College of Sports Medicine Position Stand. Resistance Training Prescription for Muscle Function, Hypertrophy, and Physical Performance in Healthy Adults: An Overview of Reviews · Medicine & Science in Sports & Exercise